In a time when memories are being captured more and more with digital cameras, capturing a video to celebrate a family milestone can be one of the most sincere and enduring gifts you can offer.
A birthday, anniversary, graduation, or even a simple holiday dinner, making clips and photos into a professionally made family video can bring strong emotions and serve as a cherished keepsake in the years to come.
One of the finest software programs available for making these kinds of videos, particularly for those who do not want to spend hours learning complicated programs, is CapCut Desktop Video Editor. With its simplicity and powerful features, CapCut enables even amateur video creators to make stunning and professional-quality celebration videos. Plus, features like text-to-speech are available to easily add narration or captions, making videos more inclusive and polished.
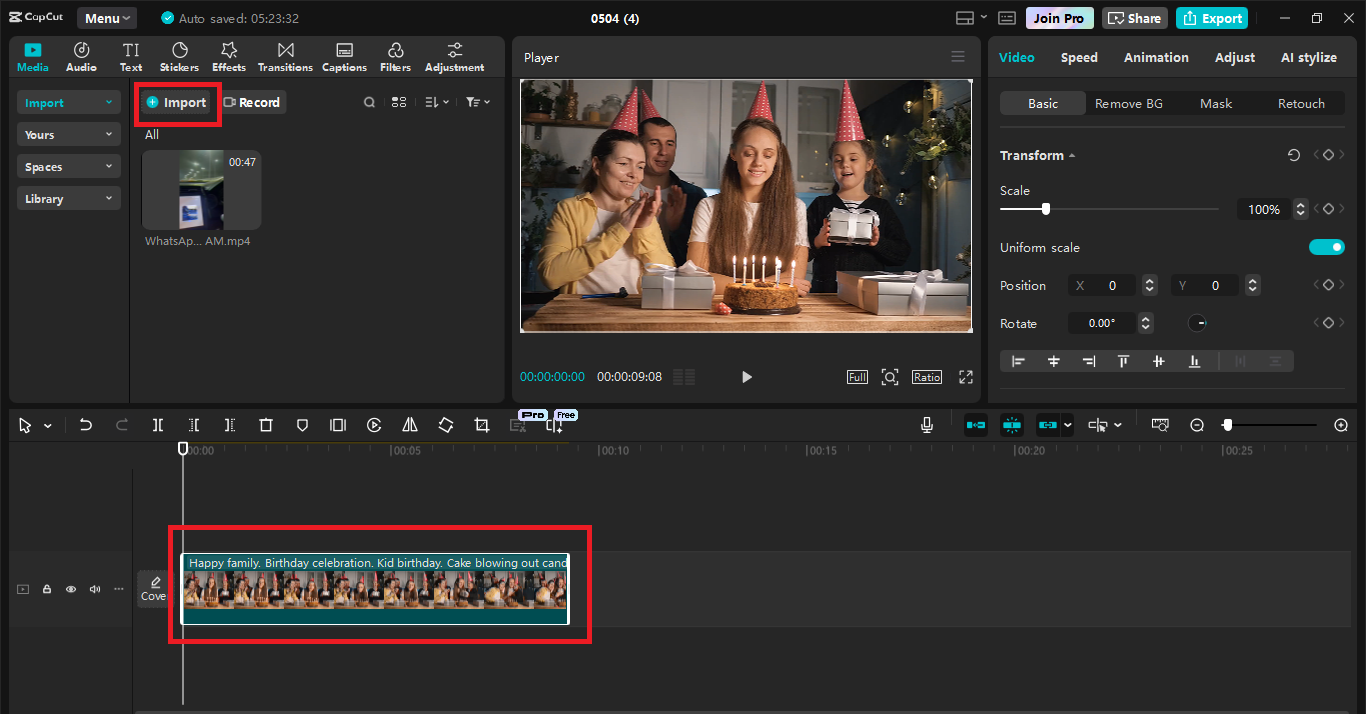
Step 1: Import and Organize Your Media Files
The first thing you do in any editing project is get your assets in order. Open the CapCut Desktop and start a new project by clicking the “New Project” button. Once you’re in the edit space, go to the top left side of the screen for the “Import” option. Use this to import all of your media—videos, images, audio clips, and whatever else you need to add. Once you have everything imported into CapCut’s media bin, drag your clips onto the timeline in the order you want to have them presented. Don’t stress if you need to have it all just so right away; you can easily rearrange it later as your story comes together.
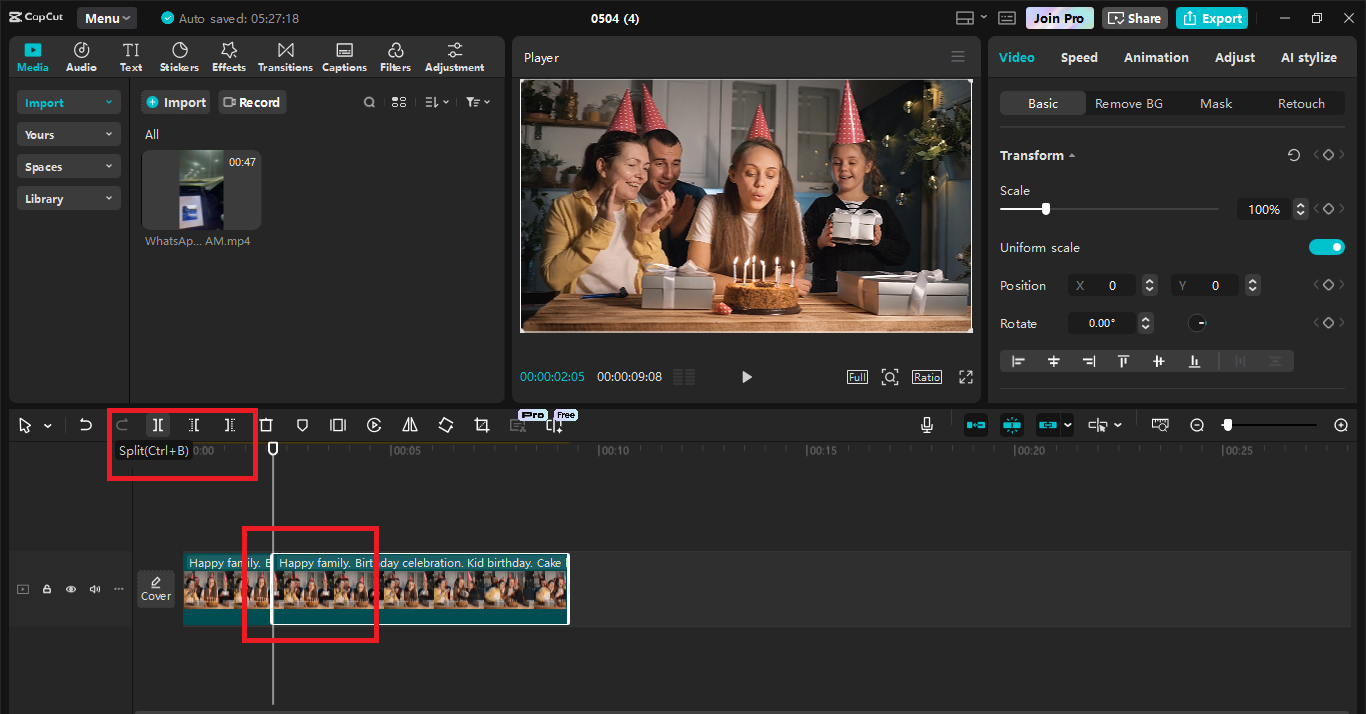
Step 2: Trim, Arrange, and Clean Your Footage
With all your clips in the timeline, you can now begin trimming. Videos recorded at events like parties contain a lot of filler shots—like people messing around with the camera, long pauses, or panning camera—and taking these out makes the final video tighter and well-paced. To trim out sections of footage that are not needed for your clip, in CapCut, you simply click any clip in your timeline and either use the trim handles or the split tool to cut out unused shots.
Similarly, you can rearrange which clips precede and follow what by dragging clips into position. This is when your story really begins to come together. This is also where you can include text titles, e.g., occasion title and date, when you open up the video. CapCut has text templates you can simply use, so there is no need for graphic art skills to make them professional.
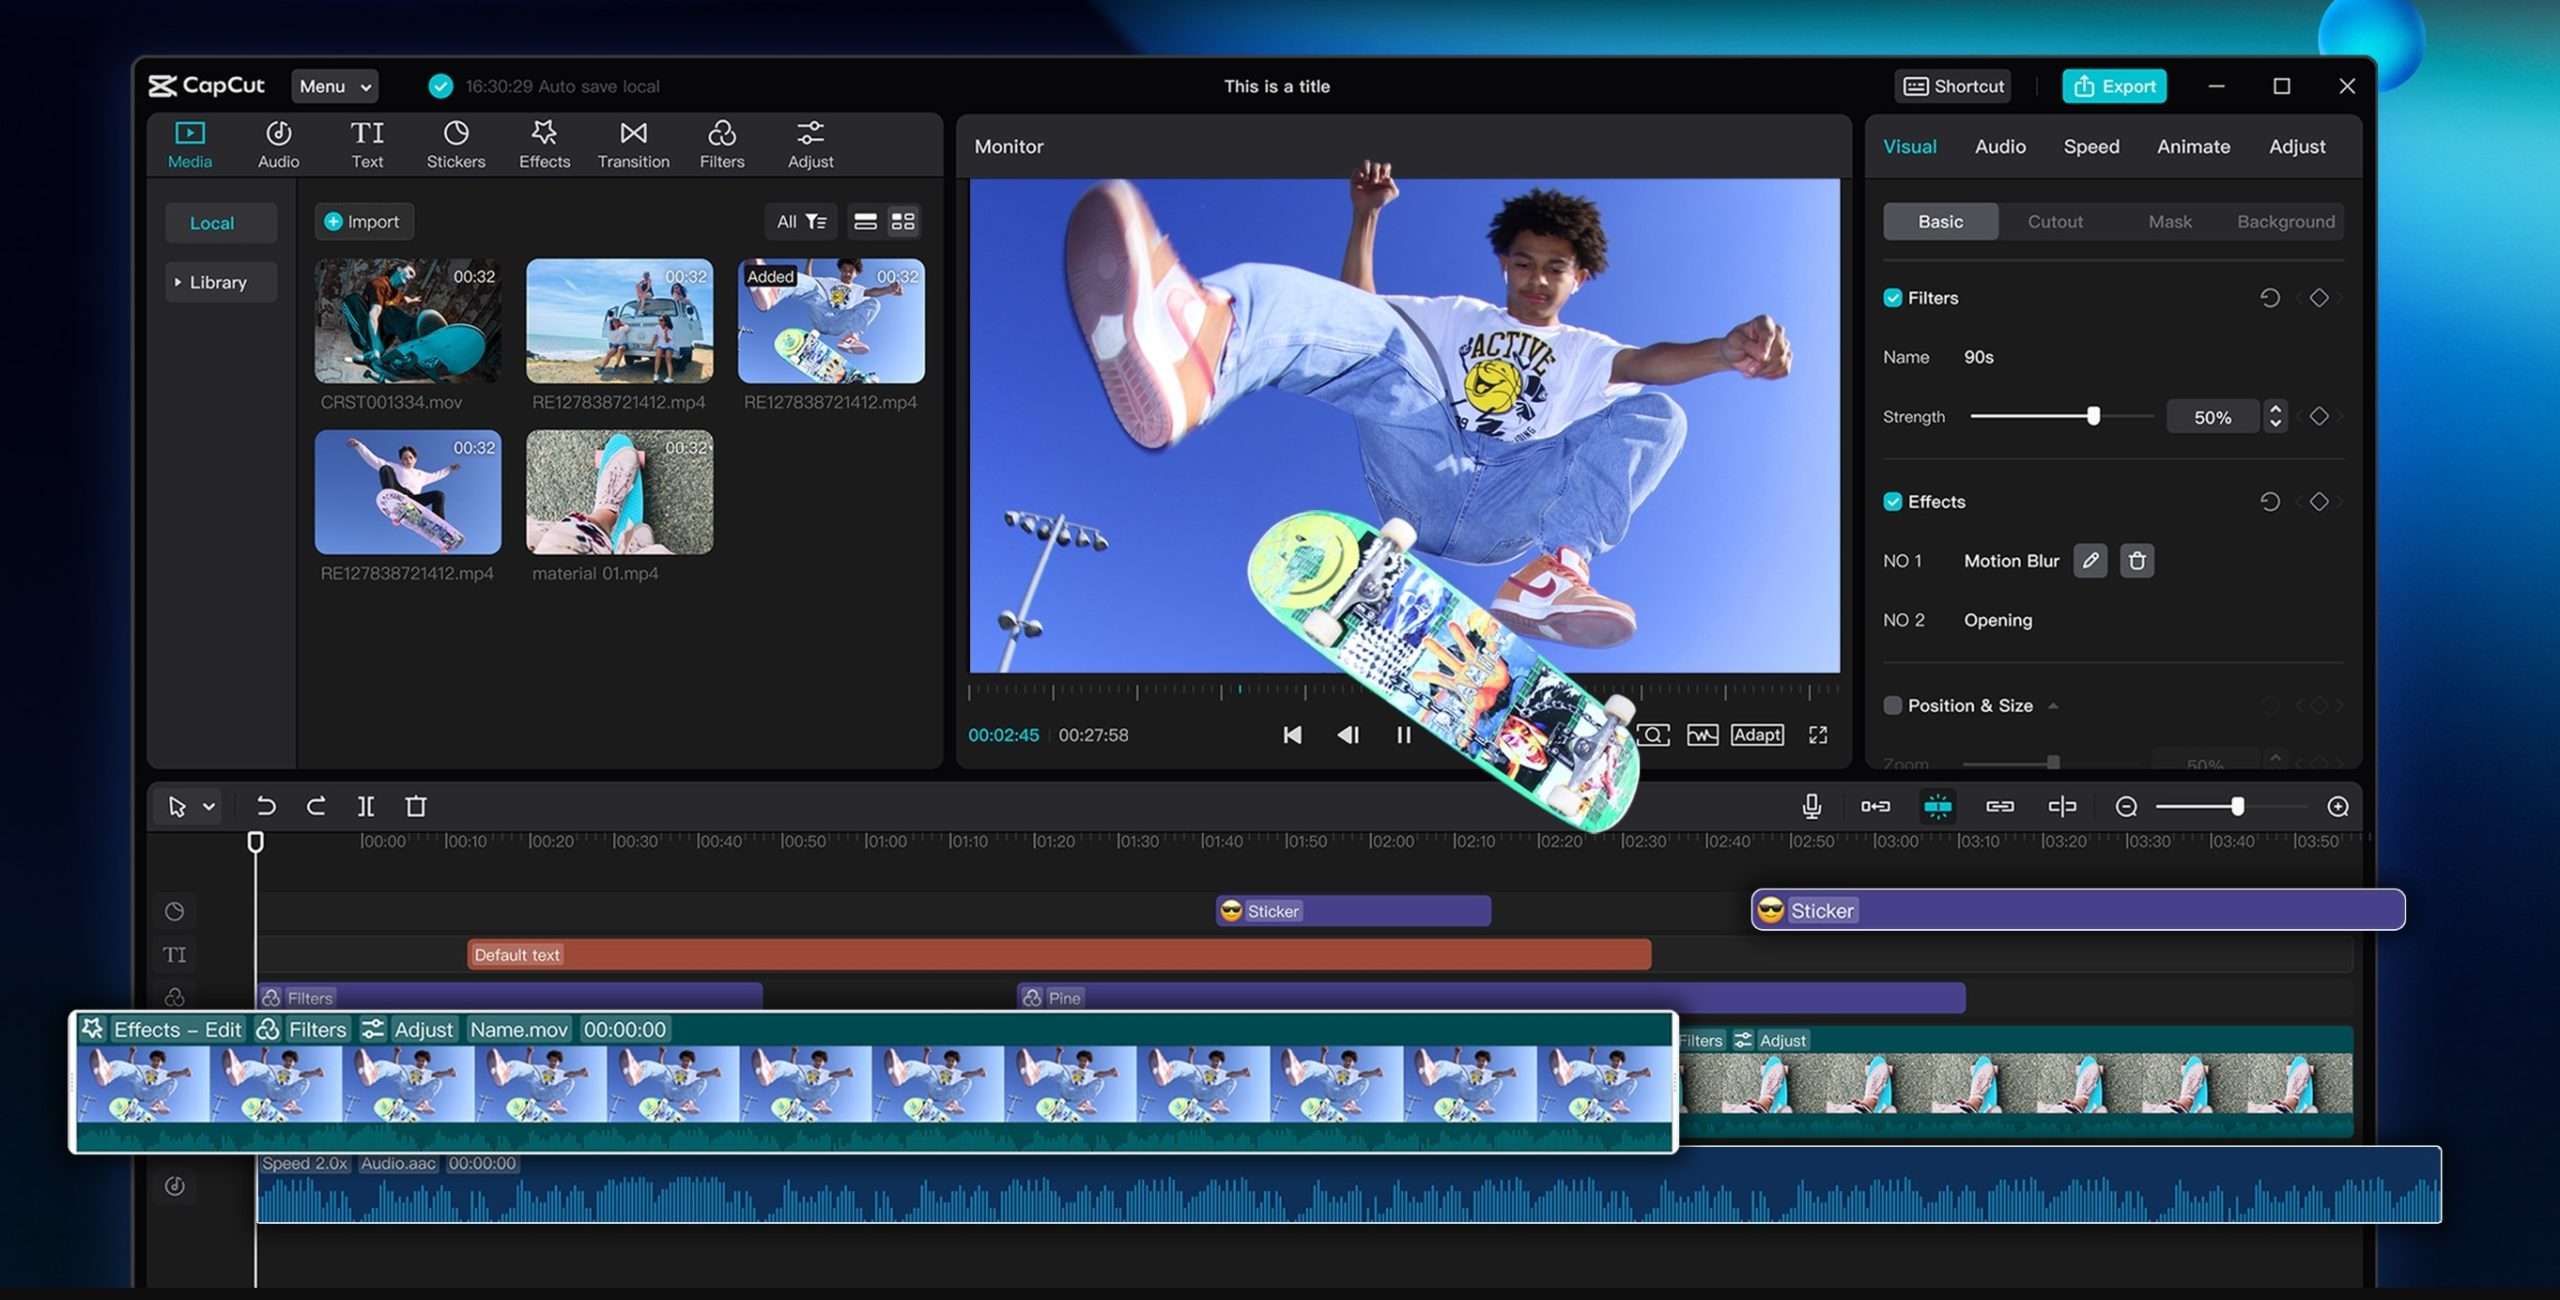
Step 3: Insert Music, Transitions, and Effects
Now that your timeline is condensed and in reasonable order, the next thing to do is to bring your video to life with music, transitions, and effects. CapCut Desktop comes with a library of pre-installed music, or you can use your own tunes—just be sure you’re using music that you own the rights to if you plan to publish the video publicly. Once a tune is in your timeline, adjust its volume to match any voiceover sections or background music.
To make storytelling smooth, adding transitions between sections—fade-ins, wipes, and zoom effects can get the video moving silky-smooth from one scene to the next. CapCut simplifies this with drag-and-drop transition effects. Don’t go crazy, though—simple, subtle transitions work better than flashy ones in sentimental or emotional vids.
Also, add effects like slow motion to special moments (such as blowing out candles or the first dance) or filters to achieve a consistent tone in your shots. These add-ons add emotional depth and make the video look more cohesive and professional.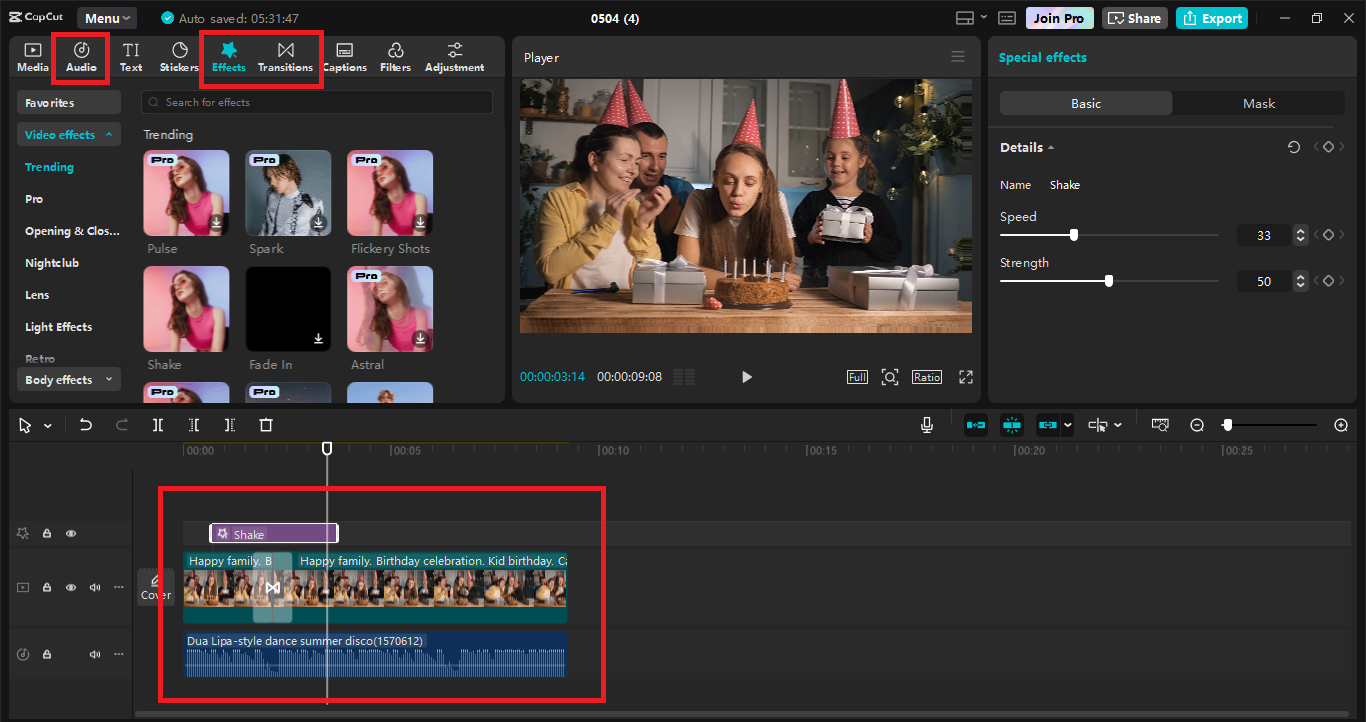
Step 4: Personalize with Overlays, Text, and Stickers
Now that your foundation video is organized and enriched, it’s time to add the personal touch. Here you can add the personal touches that reveal the personality of your family. CapCut Desktop enables you to add overlays—these can be extra photos, handwritten messages, or even short video messages from family members. You can add text along the way as well, describing what’s happening, quoting the important lines, or labeling some scenes as “Dad’s Speech” or “The Surprise Entrance.” The software has animated text options that can make these additions pop without taking away from the content.
Stickers are another great way of adding fun, especially for kids’ parties or casual gatherings. Emojis, confetti bursts, and themed icons all help bring the party vibe visually. Now, don’t hesitate to let your imagination go wild, but do try to maintain your design aesthetic consistent throughout the video to maintain visual harmony. Some editors even use a voice changer to alter greetings or character voices, adding a creative and humorous flair that kids and adults alike will enjoy.

Step 5: Review, Export, and Share Your Finished Video
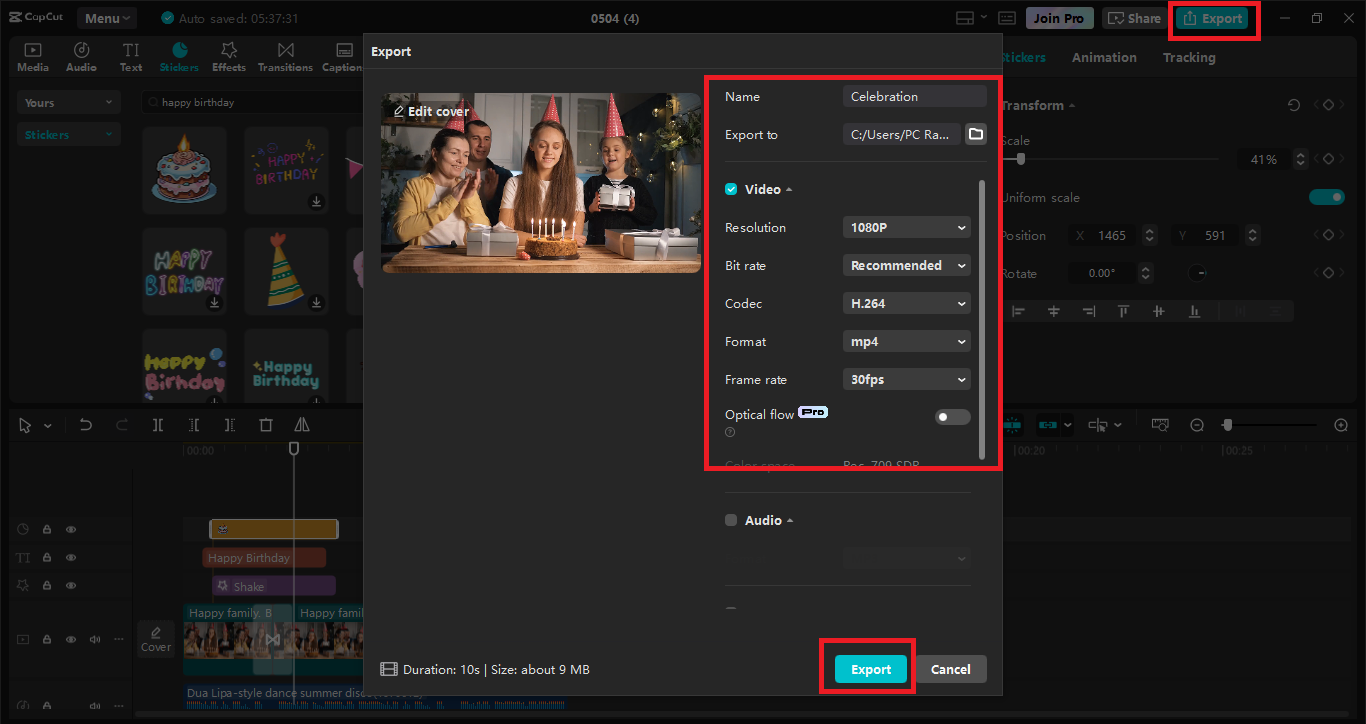
Once all of that is done, the last thing is to proofread the video thoroughly. Play it back from start to finish and check for jarring cuts, audio joins, or text typos. It’s worth having a quick break and then coming back with fresh eyes—you’ll spot small mistakes then. If you can, send it through to a family member or friend and take their comments before you’re done.
When you’re satisfied with the video, click the “Export” button top right. Select your desired resolution—1080p will be good enough for family vids, but 4K is an option for higher-end material. Select the output type (MP4 is the most compatible) and give your file a name. CapCut will render the video and export it to your selected folder. From there, you can upload to a private YouTube link, share to Google Drive, post to social media, or even burn to DVD for older relatives who prefer it in hand.
Final Thoughts
Creating a family celebration video using CapCut Desktop is not merely cutting clips into pieces; it’s narrating a story, keeping memories alive, and making people smile. You can also use tools like CapCut’s AI Video Generator to further enhance your video editing experience by converting scripts to videos.